Monday 16 June 2014

Explosion Box

Hey everyone!! Do you remember the first video about the first time I did an explosion box....well now I suddenly feel like doing a tutorial.

This is what it looks like closed :


And this is what it looks like when you lift the lid. This is the side view. As you can see, it has 3 layers of boxes and a 3 tier cake:


 And this is what it looks like from the top view:


The following will be a step by step (hopefully) tutorial for this awesome explosion box:
The papers that I have used are Rosie's Studio Designer Scrapbook Pad which comes in different designs. I chose a Garden Style specifically because it looks antique and my friend loves these types of designs. They measure 30.5 by 30.5 cm which is a good for this project. 

Step 1:

Get your 4 papers ready to measure and cut.

I used this for the box; which you can see from the photo at the top. I used 2 sheets of this paper for this project; one for the box and the lid:


This one I used for the second layer:


And the last one I have used a neutral colour to tone the bluey-green paper:


Step 2:

Measure your first box layer 27 by 27 cm and then divide it into 9 cm both sides. Cut the 4 corners. I kept the 4 corners and stuck them to the back as mine white at the back.


Step 3: 

Measure the second layer 24 by 24 cm and divide it into 3s of 8 cm.


Step 4:

For the third layer, measure 21 by 21 cm and divide into 3s of 7 cm


Step 5: 

Stick them onto each other till it becomes like this:


Sunday 26 August 2012

My 2012 Design Concepts

This year, my folio's theme is about people donating happily to poor people.
Here are some of my logos and poster designs that I have done so far by using Adobe Photoshop:

These are my logo designs starting from the first is my concepts, the second is my development and the third is my final logo:


These here are some poster concepts that I have done:


These here are my magazine concepts:


These are some that I like doing in my free time or just to polish my skills:


My 2012 Animation


My 2011 Animation


Some of my 2010 art photos that I have done in school:

This is my final sketch of my Still-life (my first time):

 These are little sketches showing different textures like watercolour pencils and normal pencils:

My water-colour version:

 This is a smudging technique by using soft lead pencil:

This is a smooth/ neat hatching by using pencil:

This is an angry cross hatching:

I also had a go at drawing mythical creatures. It was fun: 


This here is my very first painting on perspective. It was hard at first but kinda got the hang of it after a while the sky just didn't work at all for me. I have used acrylic paints:

My dragon sketches:


This here is another of my perspective sketch and I have used charcoal chalks. I have named it 'Gloomy City':

 A 3D-Ear sketch. I was pretty impressed by the end result:

 Tonal sketch using black and white crayons:

A beautiful sketch of the tui bird:

 When my teacher saw this she said that this bucket shows life....Does it?

I'm a manga and anime fan just to let you know:

 My once in a life time perspective painting using complementary colours:

 Warming up exercises:


Dry painting technique:

A digital image of myself using the artist model called Julien Opie:

Making my own woodcut design step by step:


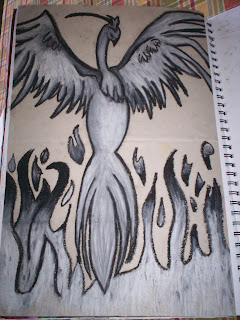
 Use of black and white crayon to draw a phoenix: 

 Shell sketching using charcoal and pencil:


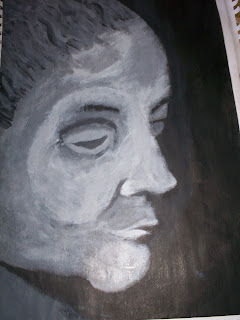
A painting of Vincent Van Gogh that I have done (took 4 days to complete):


 A sketch tattoo of the phoenix:

Looking for inspiration (was bored):

  Different angles of different birds: